I am feeling inspired on this warm September Sunday morning to make something wonderful with my new purchases from Hobbycraft. My mood is Christmassy, and yes, I realise to some, Christmas might seem like a long way off but if you've got a lot of friends and family to make for, now is the perfect time to start!
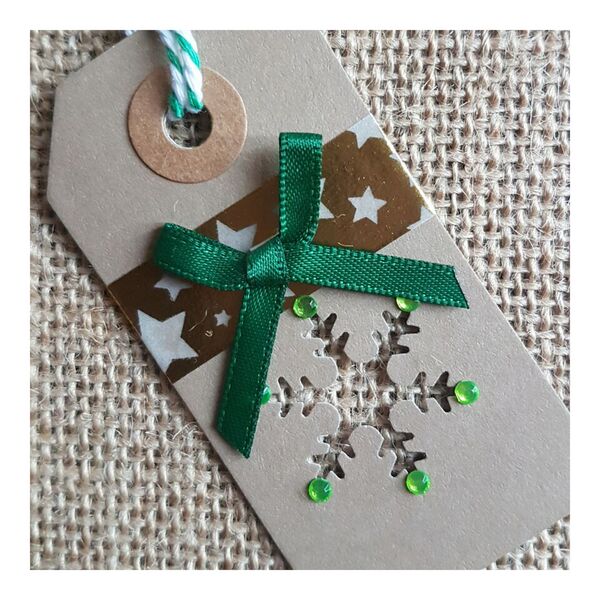
These beautiful Christmas Snowflake gift tags are of my own design and perfect as a simple project for first-time crafters to get to grips with.
Suitable for: Beginners
Time allowed: 10 - 15 minutes
You will need
1| Selection of Assorted Festive Washi Tape (I have used Hobbycraft Assorted Christmas Washi Tape 3 Pack £3.00)
2| Twine (I have used Hobbycraft Green Twine £2.00)
3| Tags (I have used Kraft Luggage Tags 30 Pack £1.50 5 cm in length)
4| Self Adhesive Gems (I have used 3 mm green gems)
5| Scissors
6| Craft Tweezers
7| Punch (I have used Hobbycraft Snowflake Small Punch £2.00)
8| Green bow to decorate
How to make
1| Place tag through the groove of the punch (use the snowflake as a guide) and position where you want the snowflake to be on your tag. Once you are happy with the position, clasp together to make a snowflake punch.
2| Measure 11.5 mm of washi tape, cut and put aside. Place the strip of the washi tape about roughly 1 mm above the snowflake (as shown below) but not so, that it is touching the punch out of the snowflake.
Wrap the washi tape around both sides of the tag and cut to measure.
3| Carefully decorate the points of the snowflake with self adhesive gems using craft tweezers.
4| Cut roughly 12 mm of the twine and thread the twine through the hole of the tag to make a loop. Affix a small green bow to the washi tape to decorate.
Now you are ready to use your Christmas tags. I will be stamping mine with names of family and friends but they will look equally wonderful with handwritten names.
Happy Crafting!